1
Create a Sendgrid Account (if needed)
Visit Sign up page in Sendgrid.
2
Verify your domain
Verify your domain or sender signature if you have not already completed it. See https://www.twilio.com/docs/sendgrid/ui/account-and-settings/how-to-set-up-domain-authentication for more details
3
Get API Key from Sendgrid
Visit API Keys page in SendGrid. Click on Create API Key button.Ensure you have provided Full Access for
- Mail Send
- Tracking -> Click Tracking, Open Tracking
4
Paste API Key in Maple
Visit the Integrations tab in Maple. Find the Sendgrid integration and click on Install. Paste the API copied from Step 3, then click Update.
5
Copy Webhook URL from Maple
6
Create Webhook in Sendgrid
Visit API Keys page in SendGrid. Click on Create new Webhook button. Paste the URL copied from Step 5.a) Ensure the following actions are selected:
c) Click Save.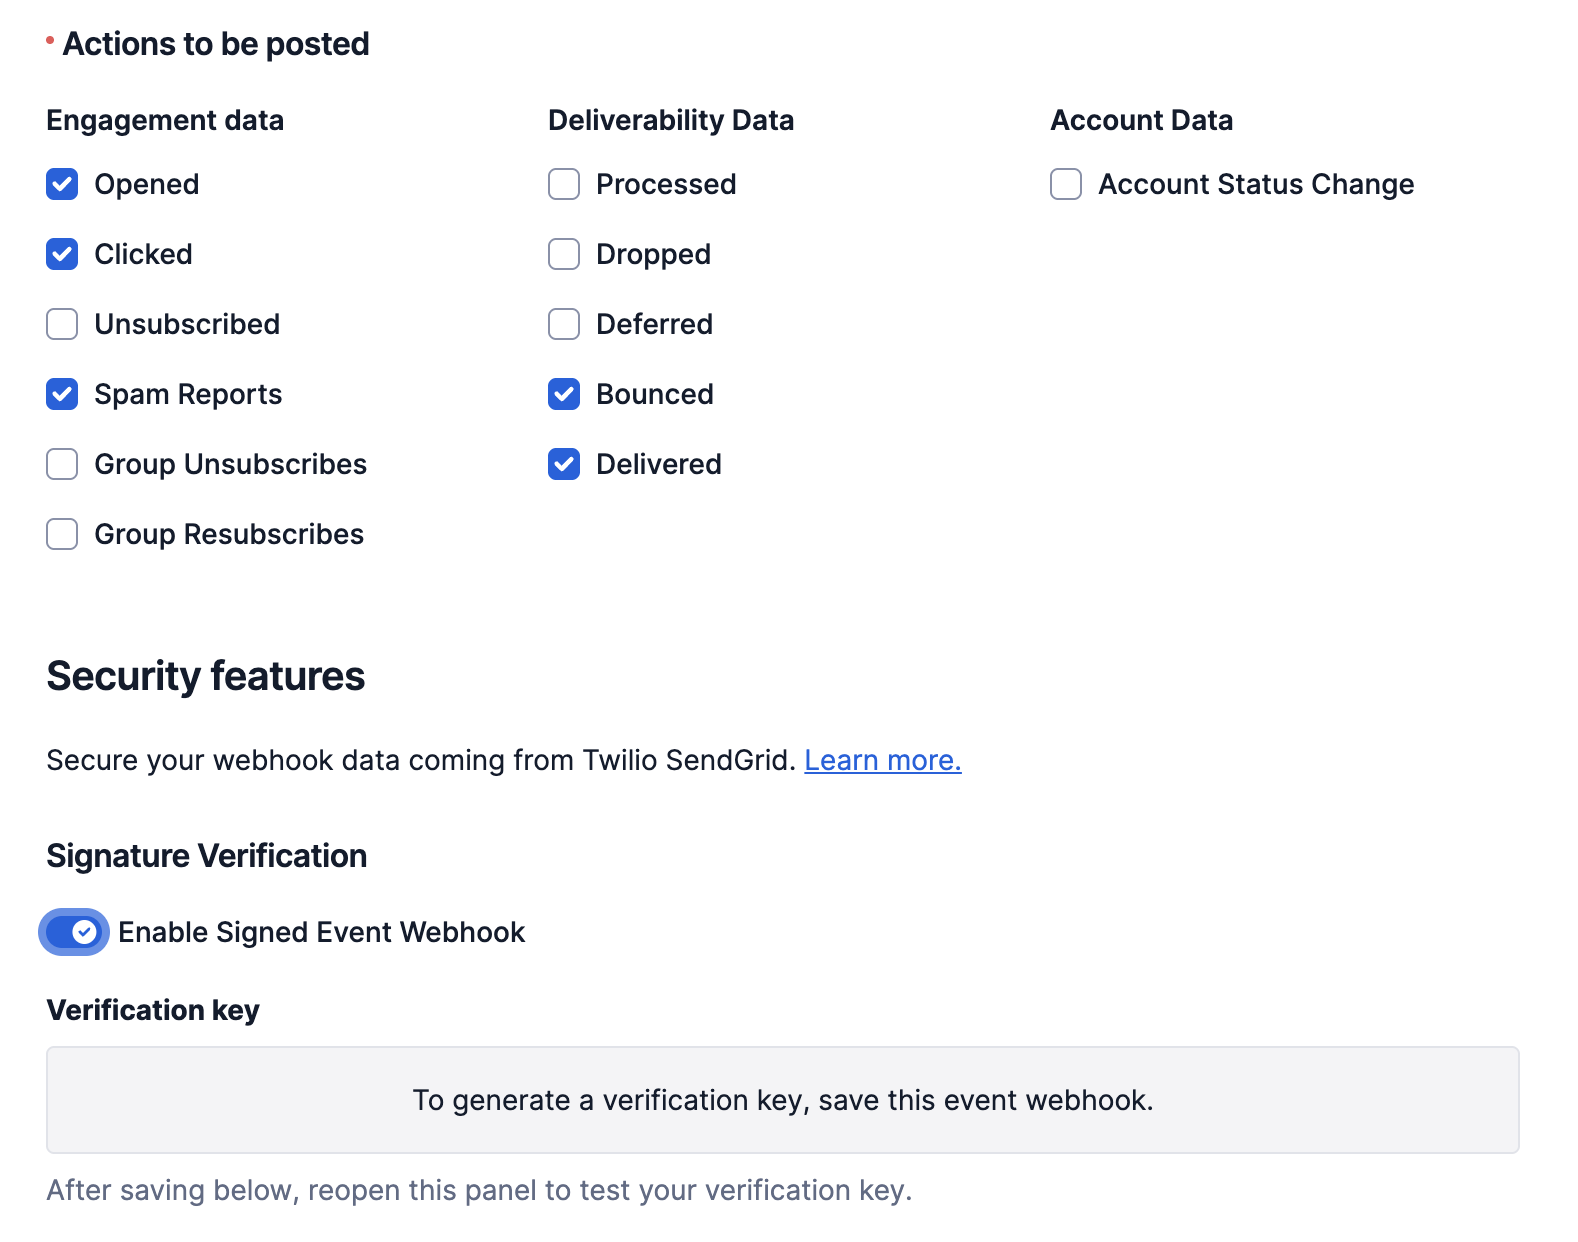
- Opened
- Clicked
- Spam Reports
- Bounced
- Delivered
c) Click Save.
7
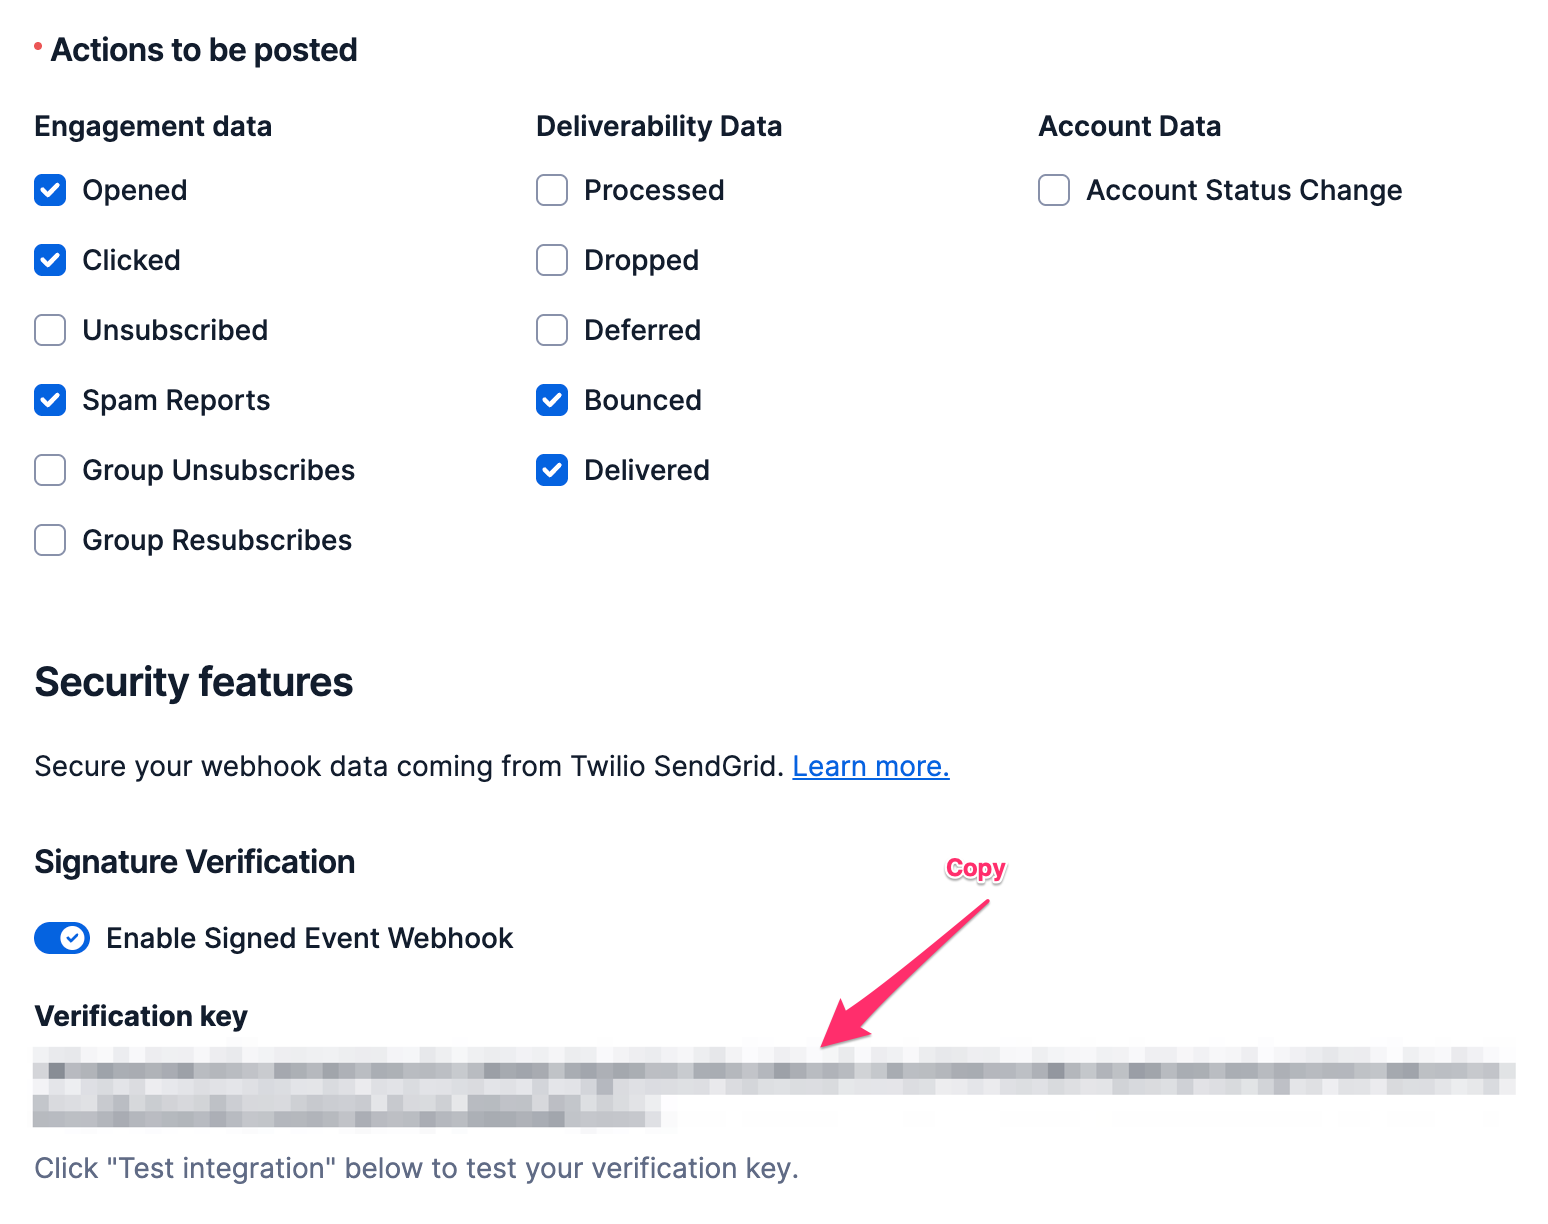
Copy Verification Key from Sendgrid
Edit the newly created Webhook. 
8
Paste Verification Key in Maple
Under the Email Tracking section, click Edit. Paste the Verification Key copied from Step 7, and click Update.
9
Provide From Address
10
Completed