New to Maple? Read Core Concepts first for an overview of key terms and entities. For a deeper billing integration via the API, see the API Quickstart.
Maple dashboard: app.maplebilling.com
1
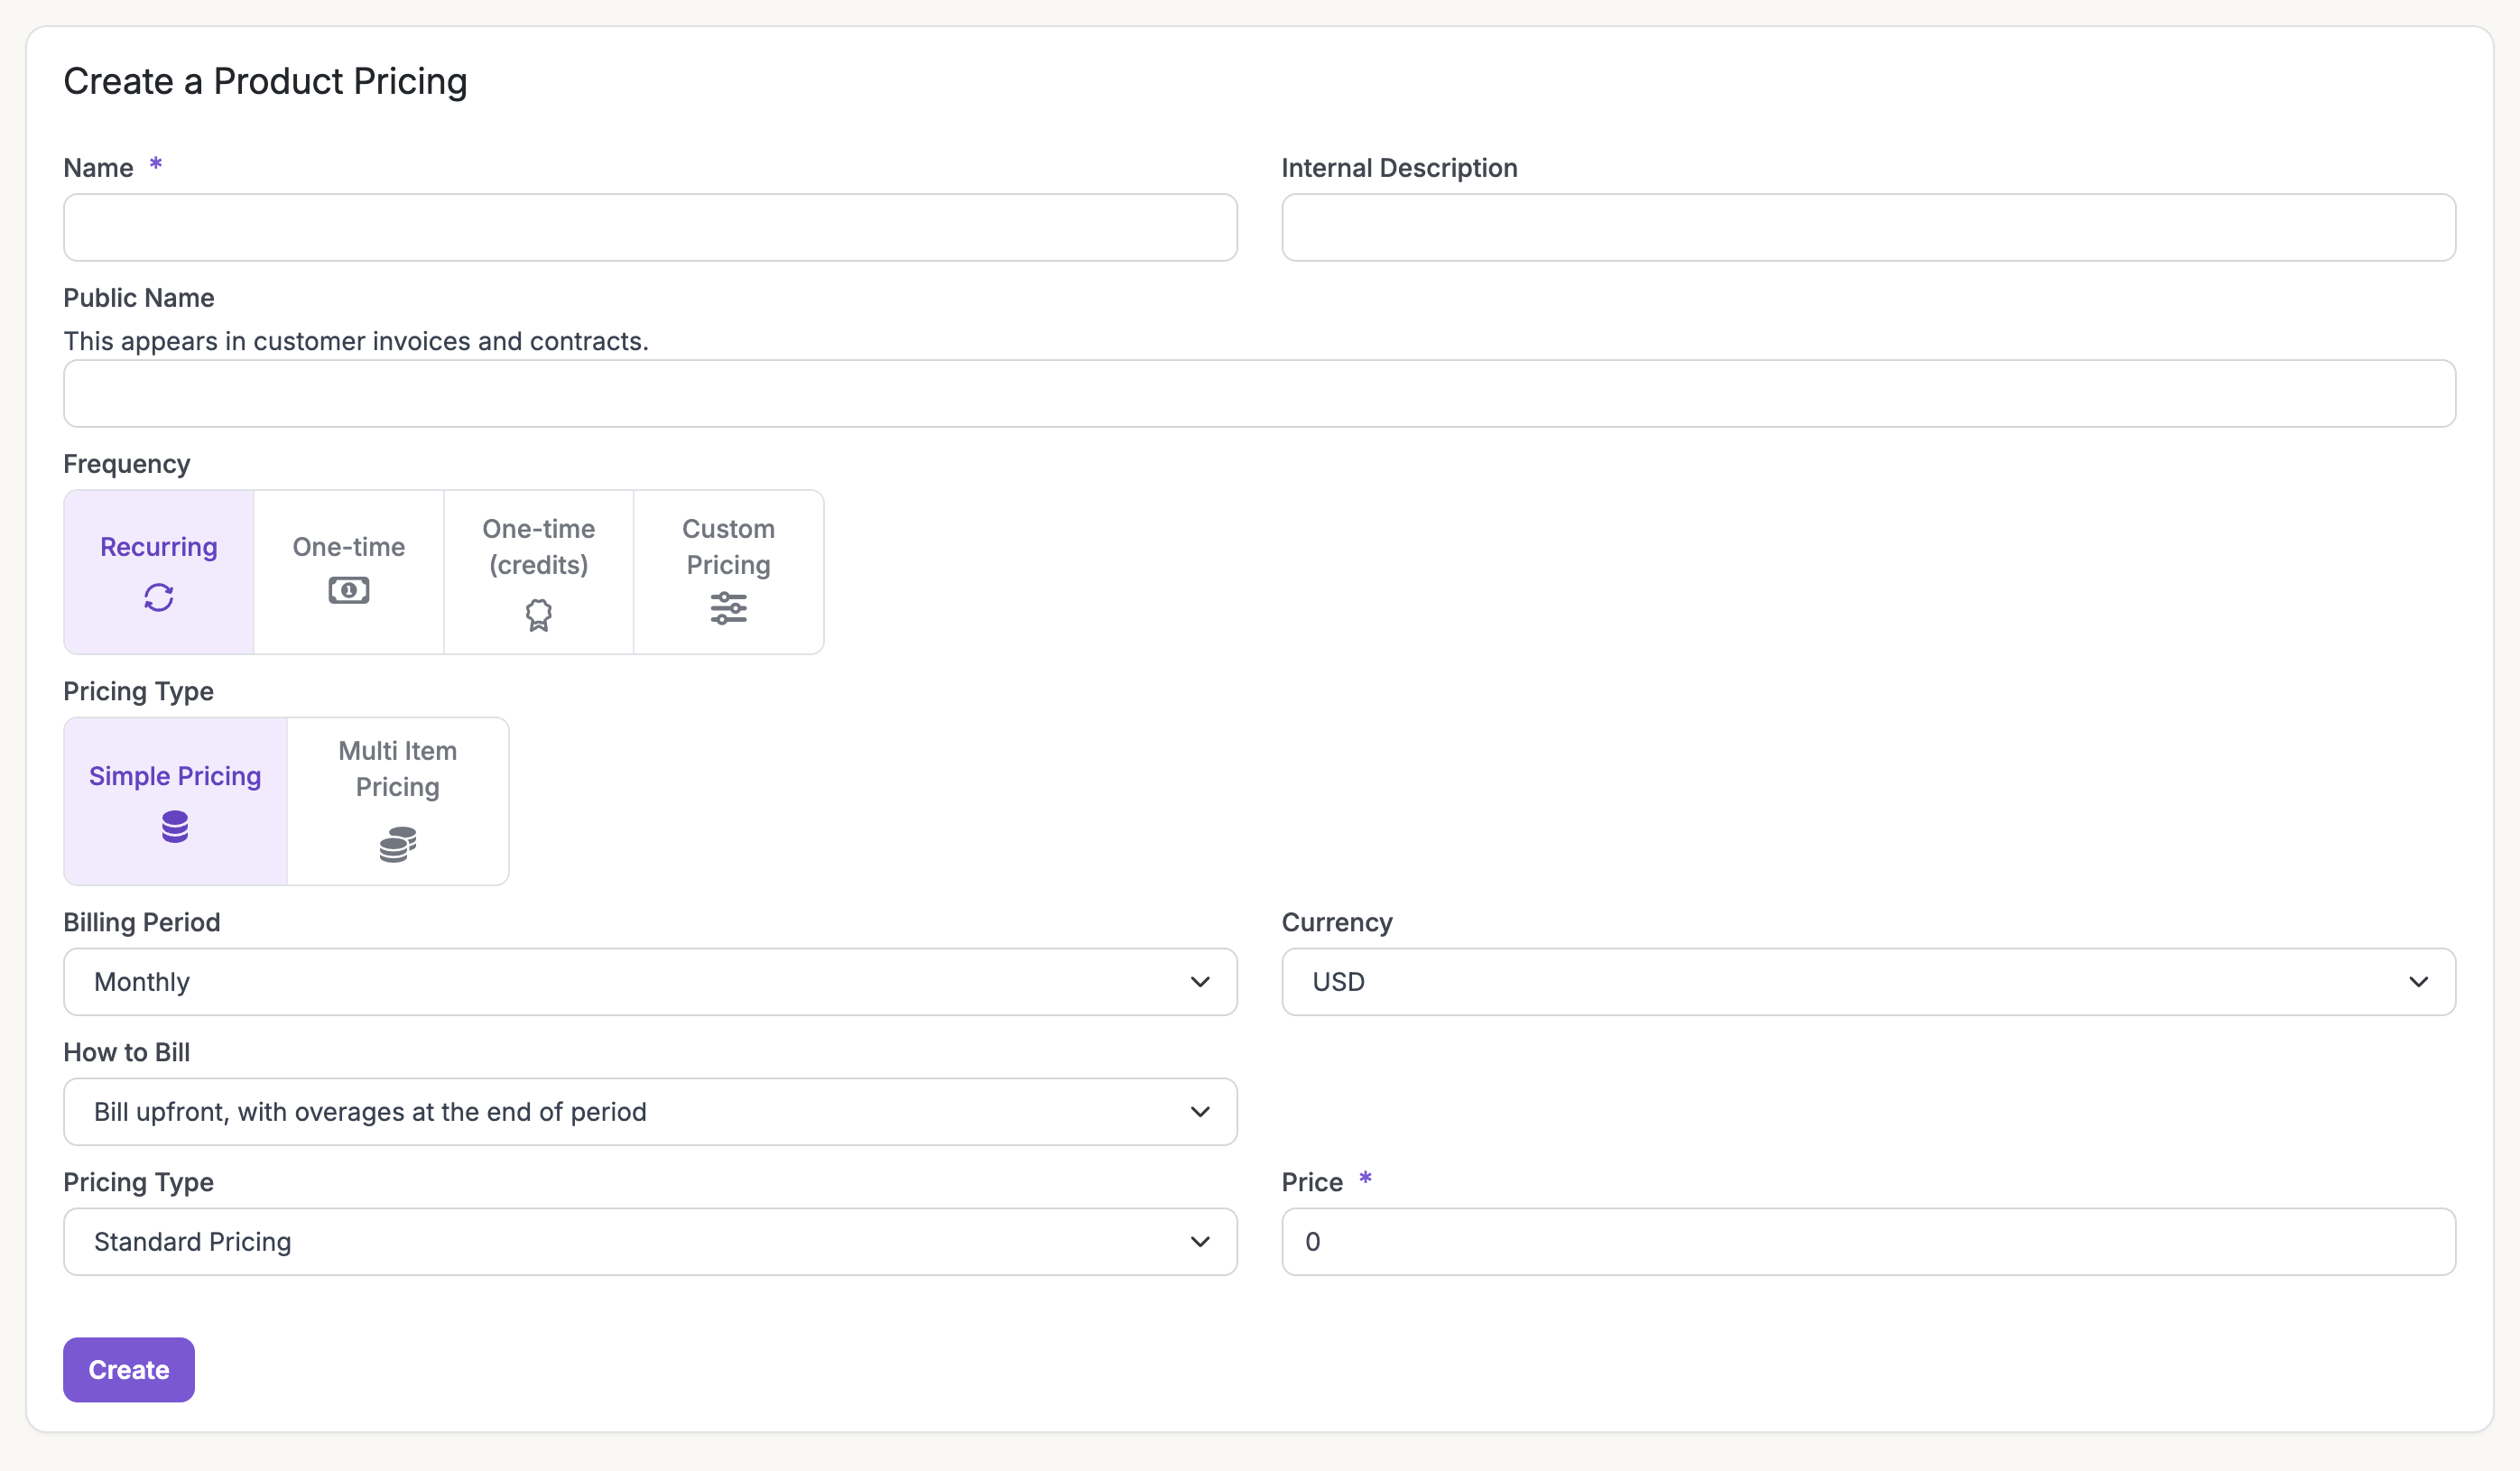
Create a Product and Pricing
Build your product and pricing catalog in Maple.Go to the Maple dashboard → Products → Overview → Add New Product.
2
Set Up Your Payment Provider
Connect a payment provider so Maple can charge invoices.Go to Integrations and click Connect on Stripe (or another supported provider). Complete the connection flow to link your account.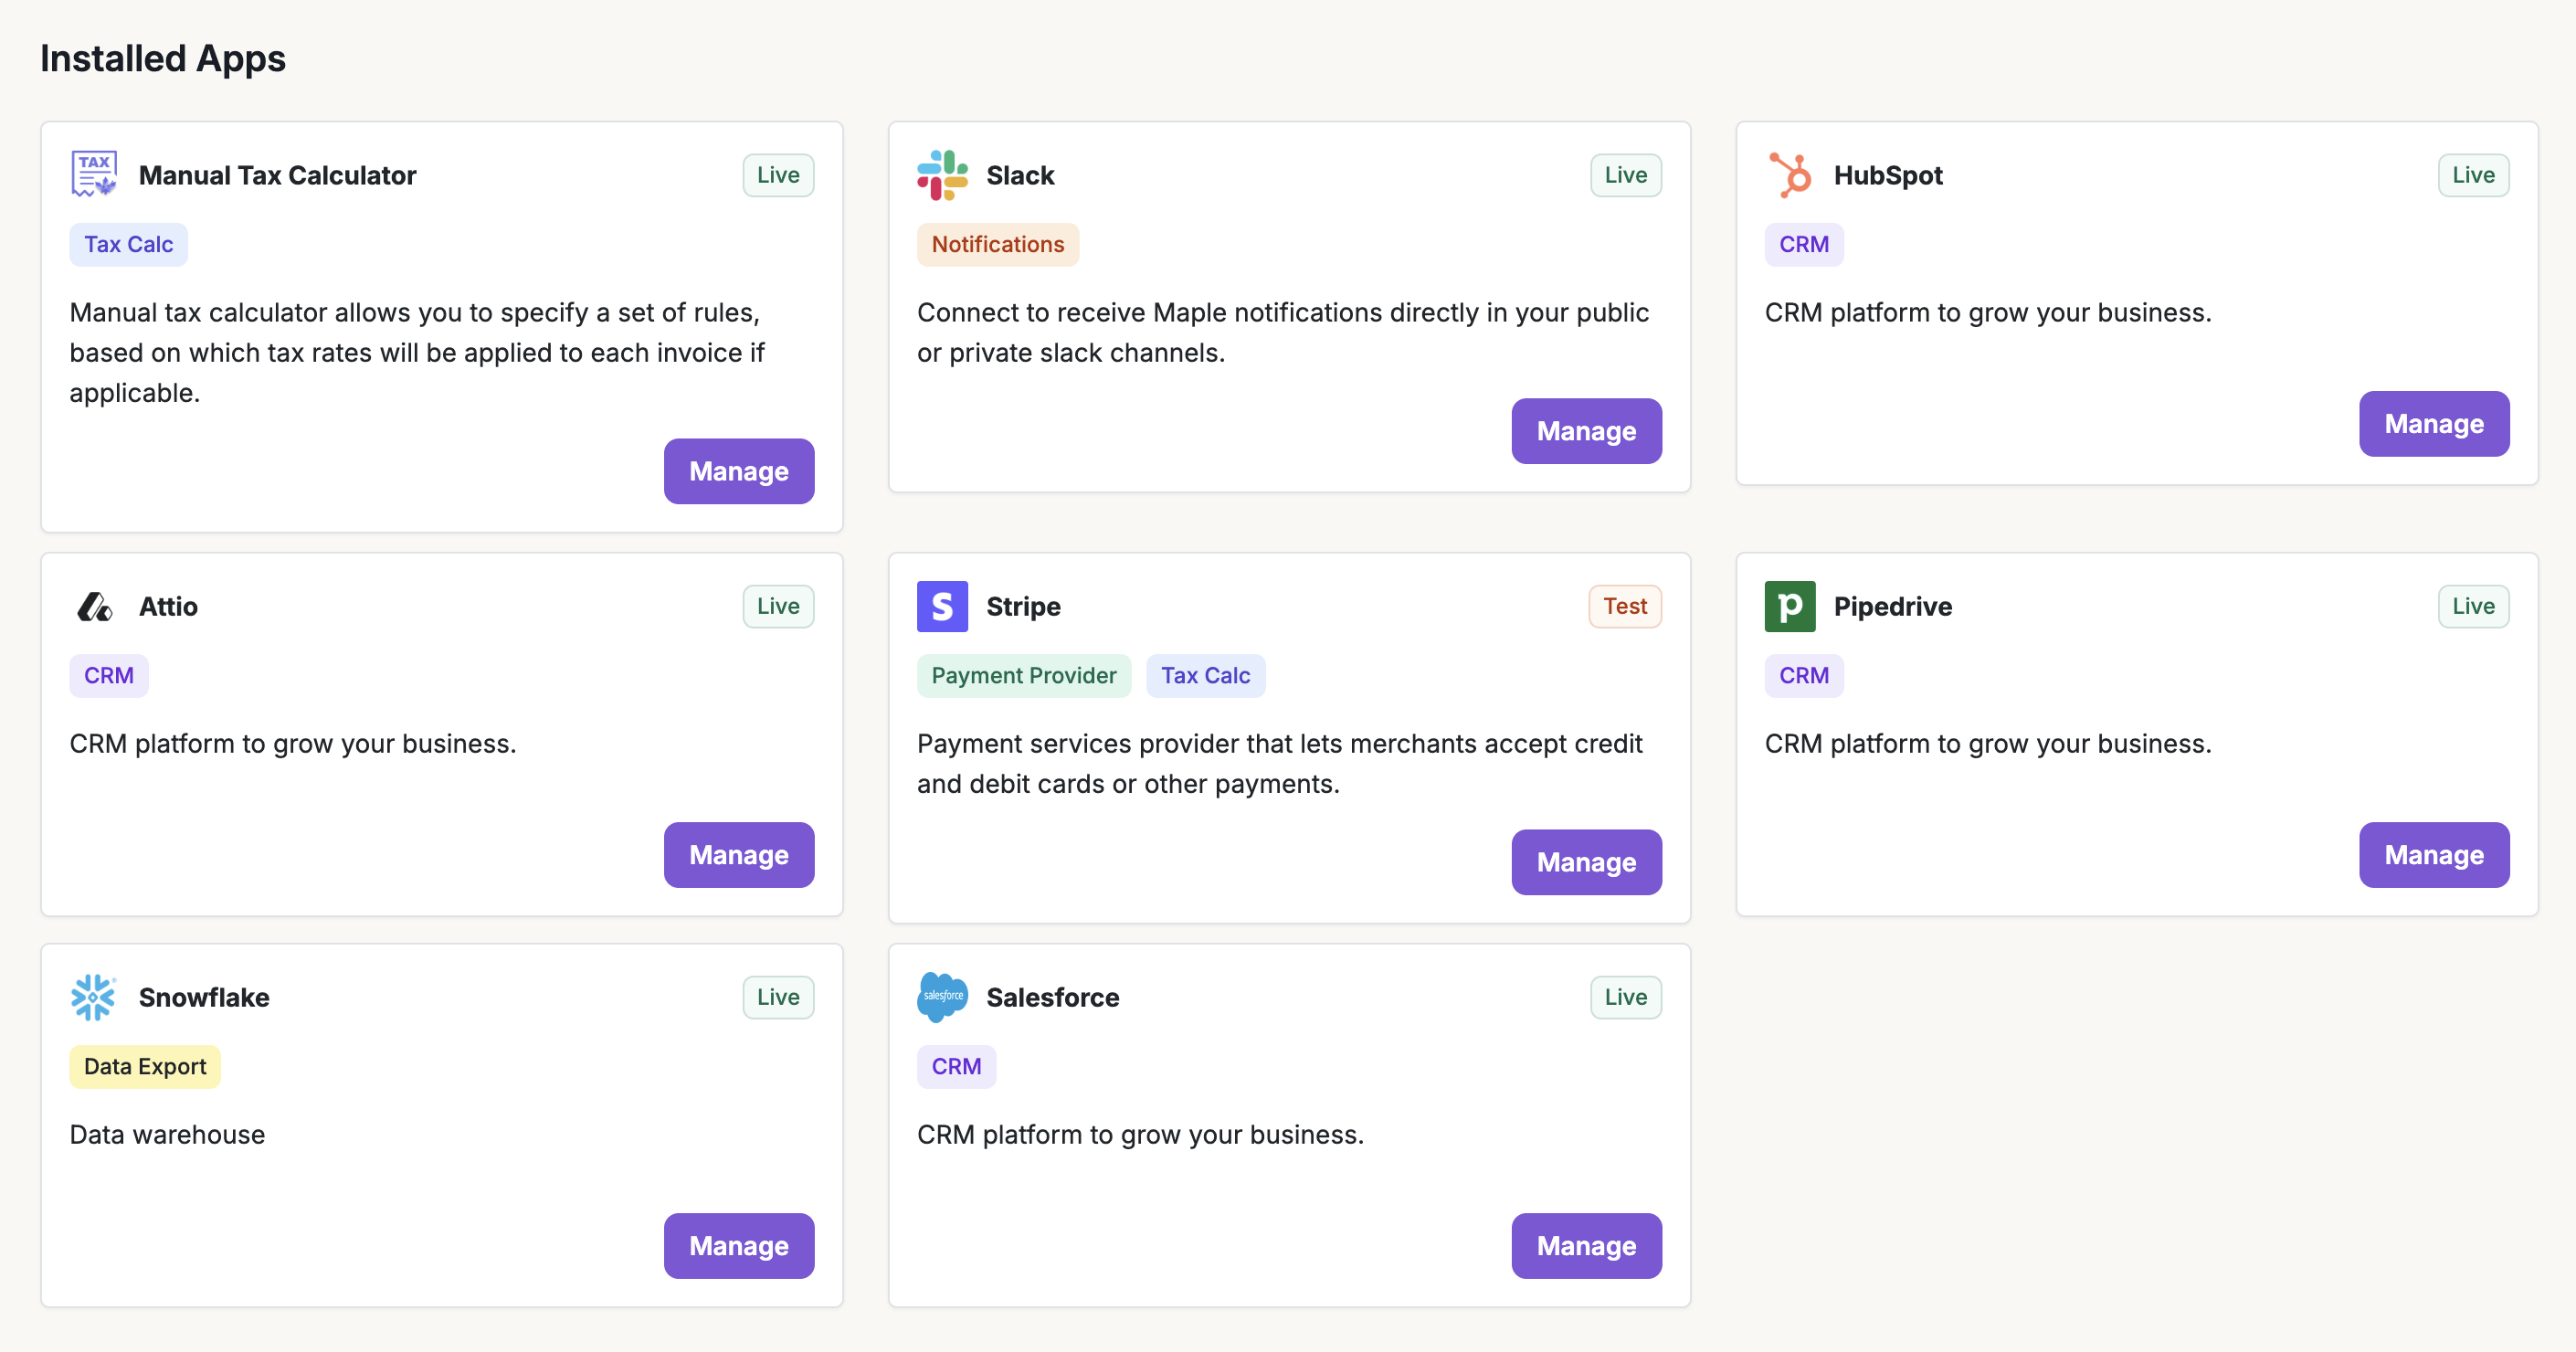
3
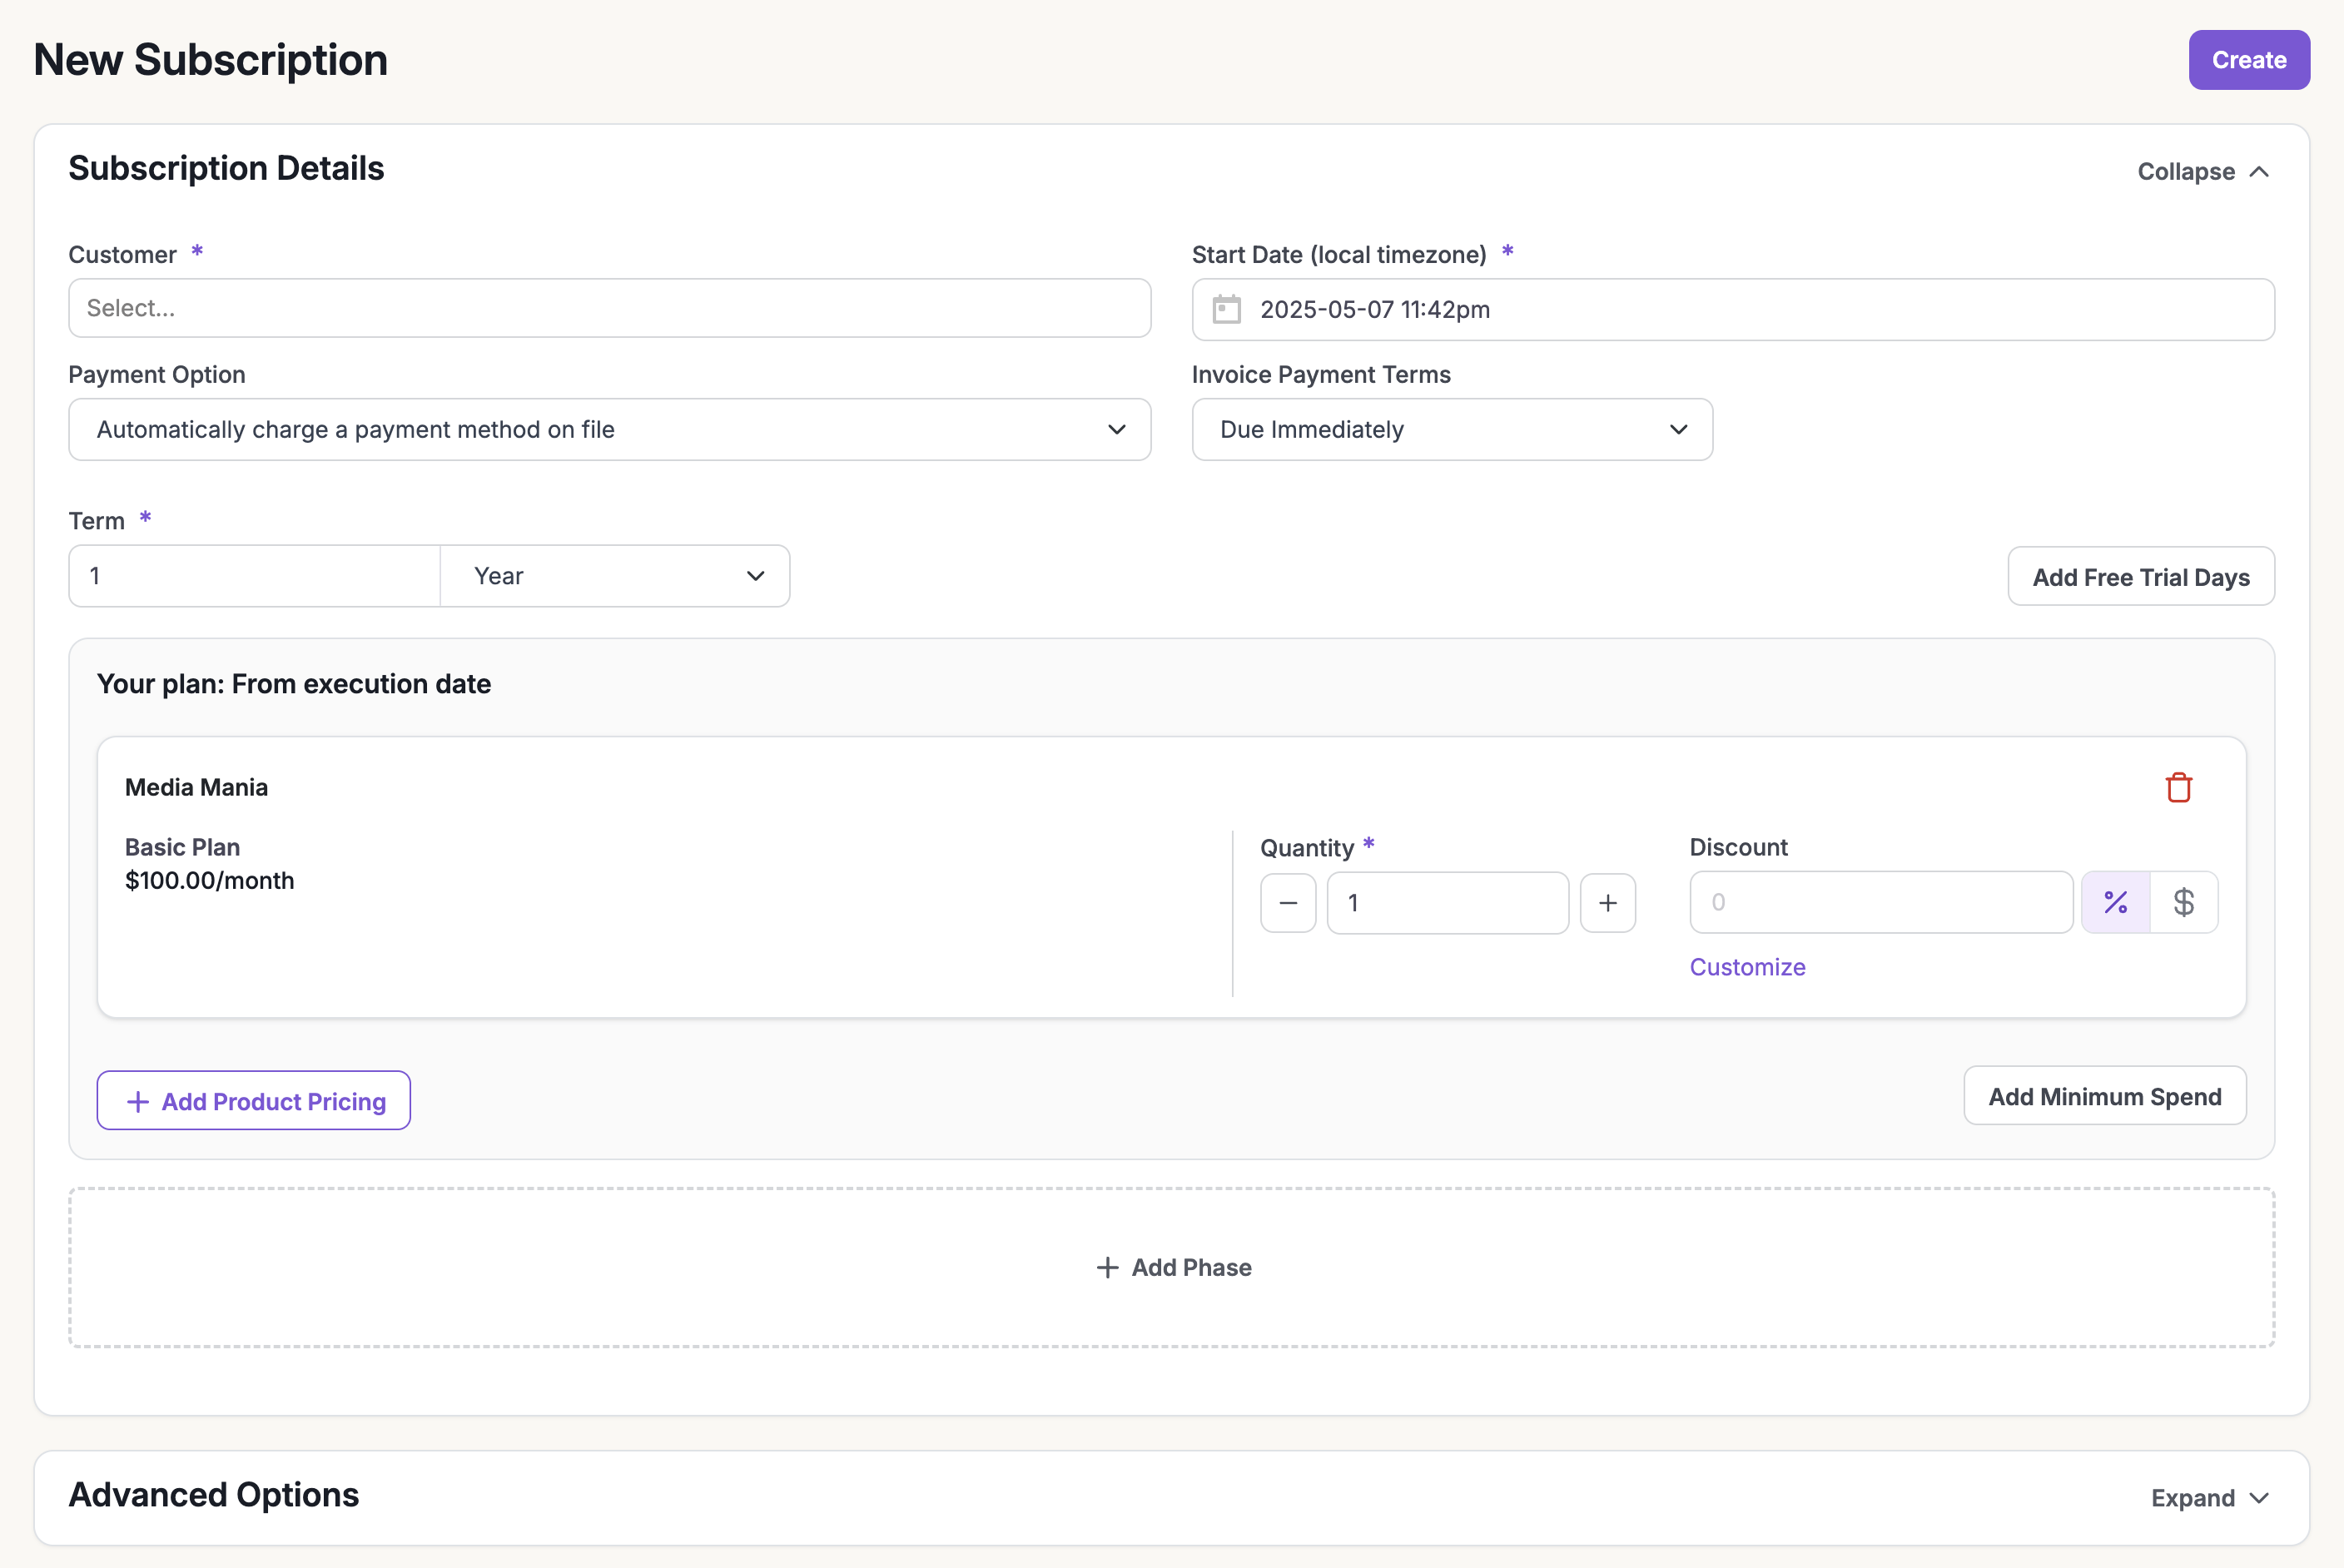
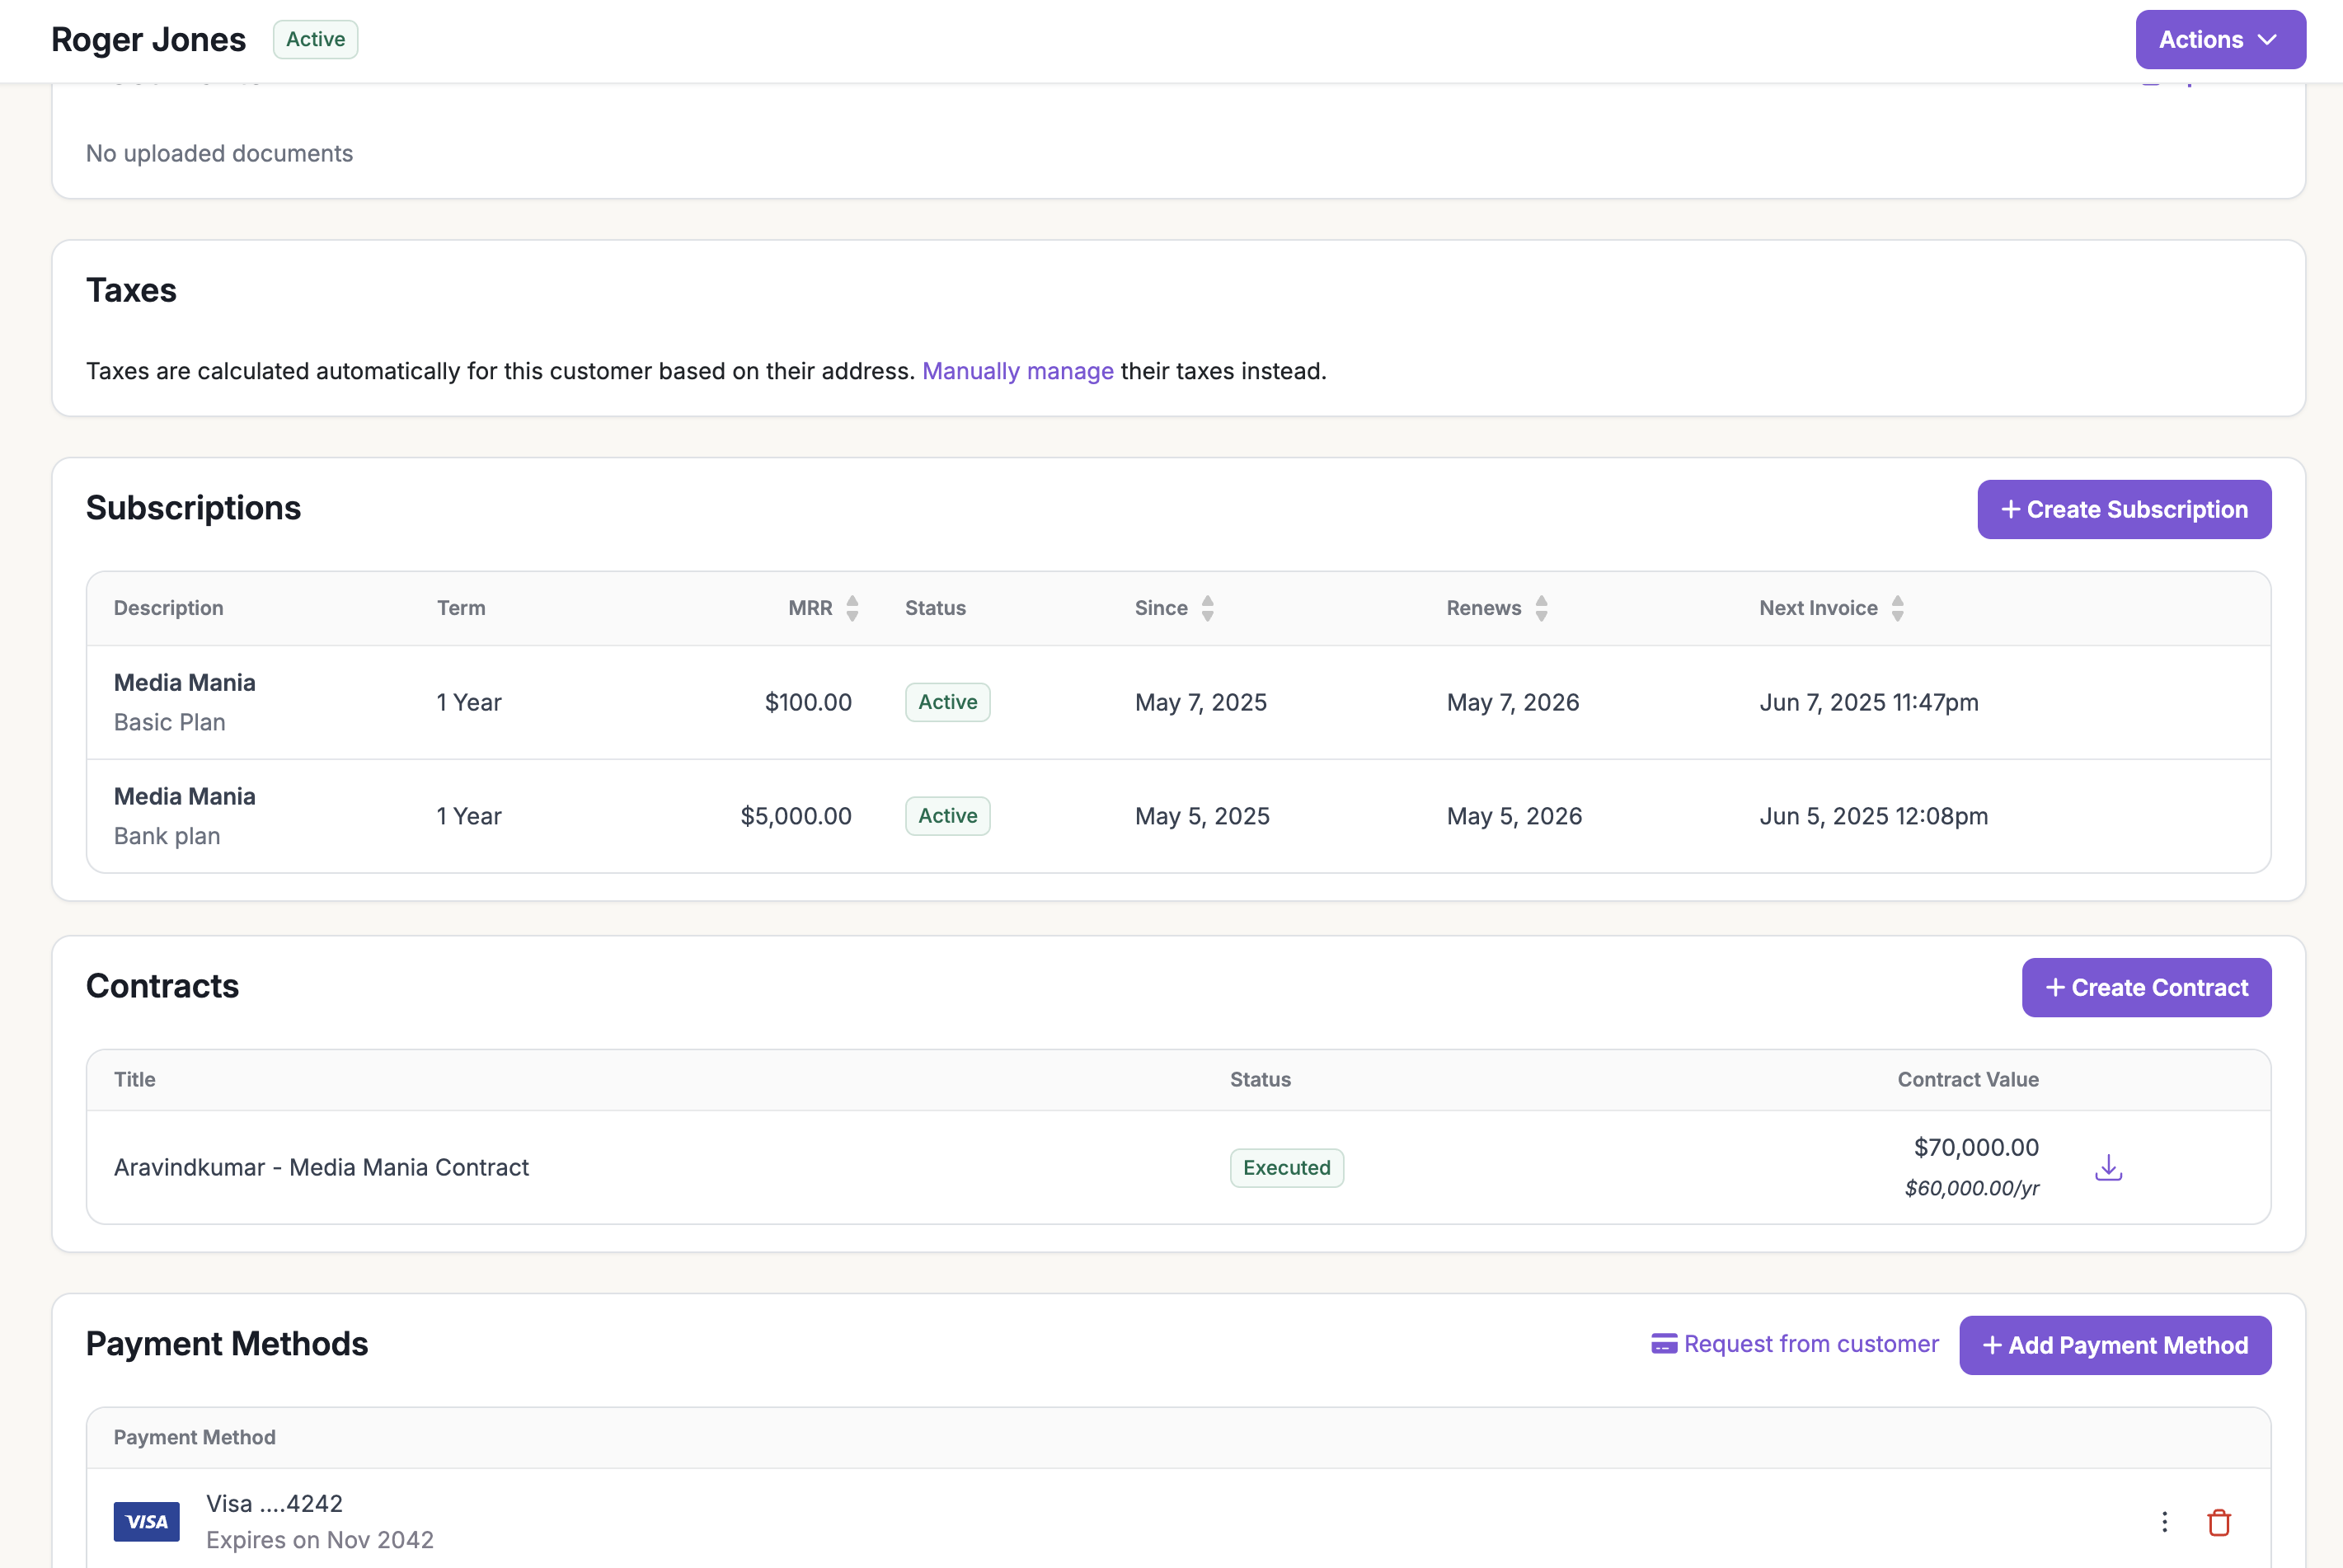
Create a Customer and Subscription
Create a customer, then attach a subscription to start billing.Go to Customers → Create Customer, add the customer details, and click Add Customer.Go to Subscriptions → Create New Subscription, choose the customer, and click Create Subscription.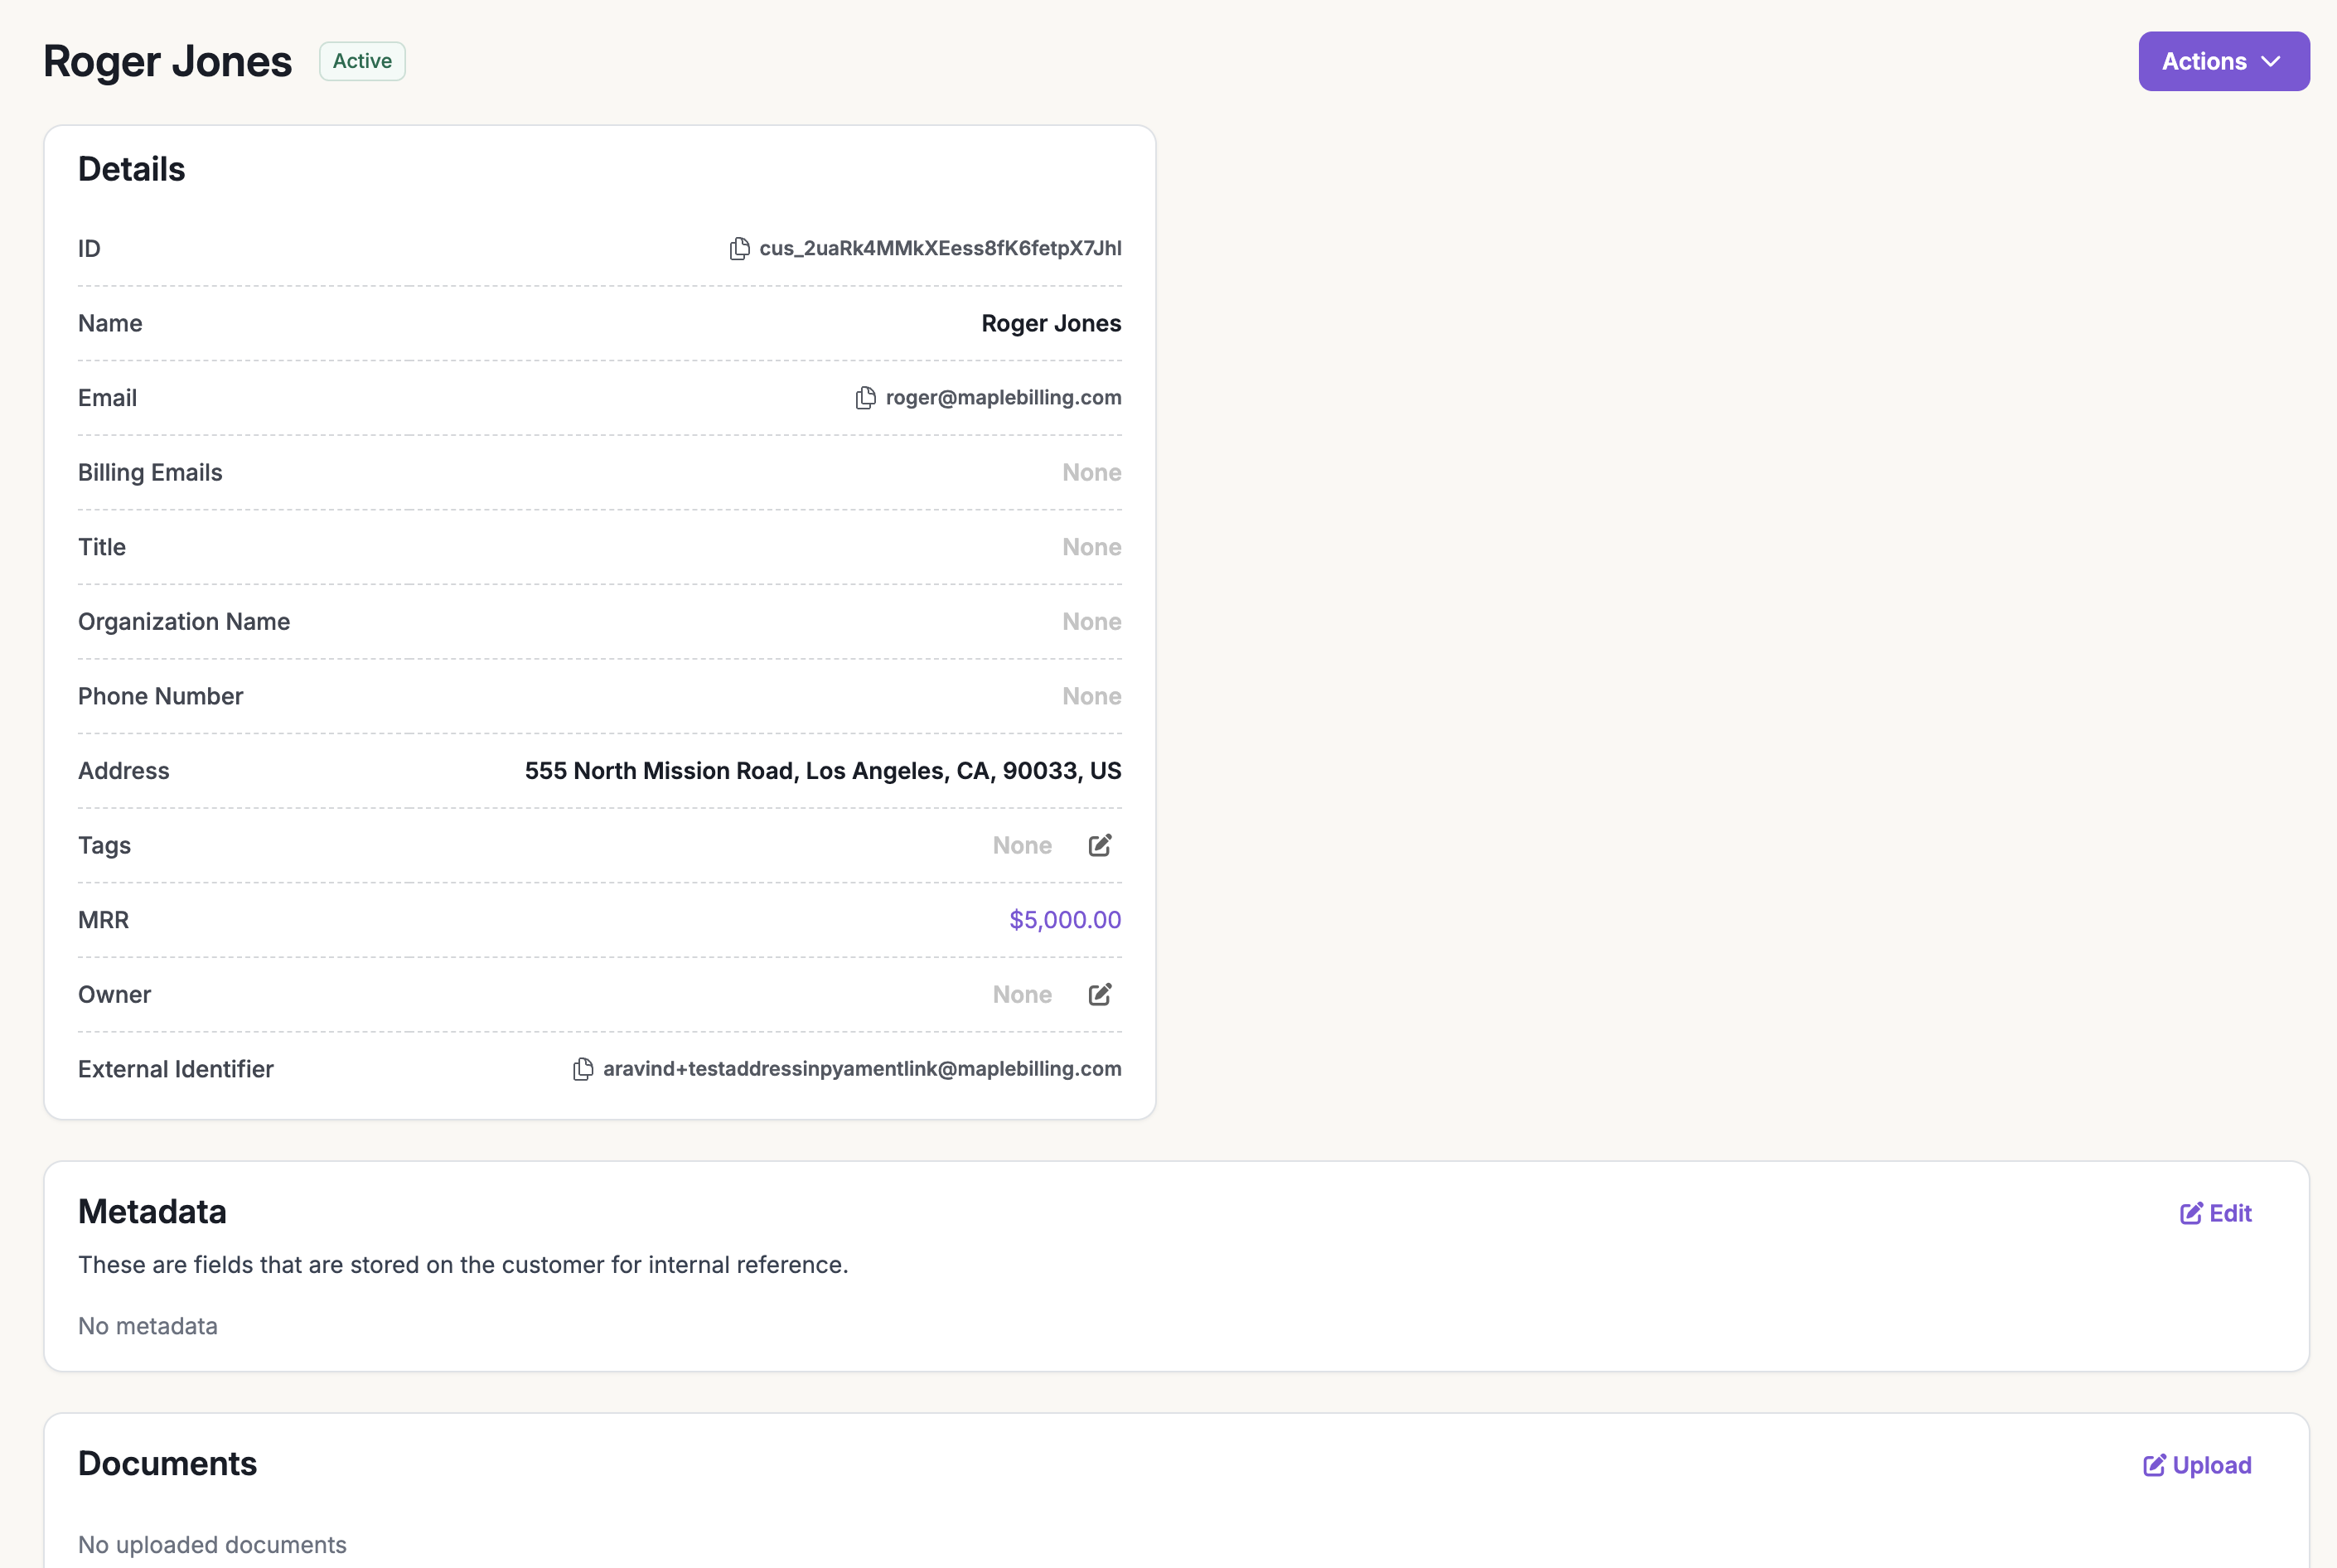
4
Review Your First Invoice and Preview the Next
When the subscription is created, the first invoice is generated and you get a preview of the next invoice.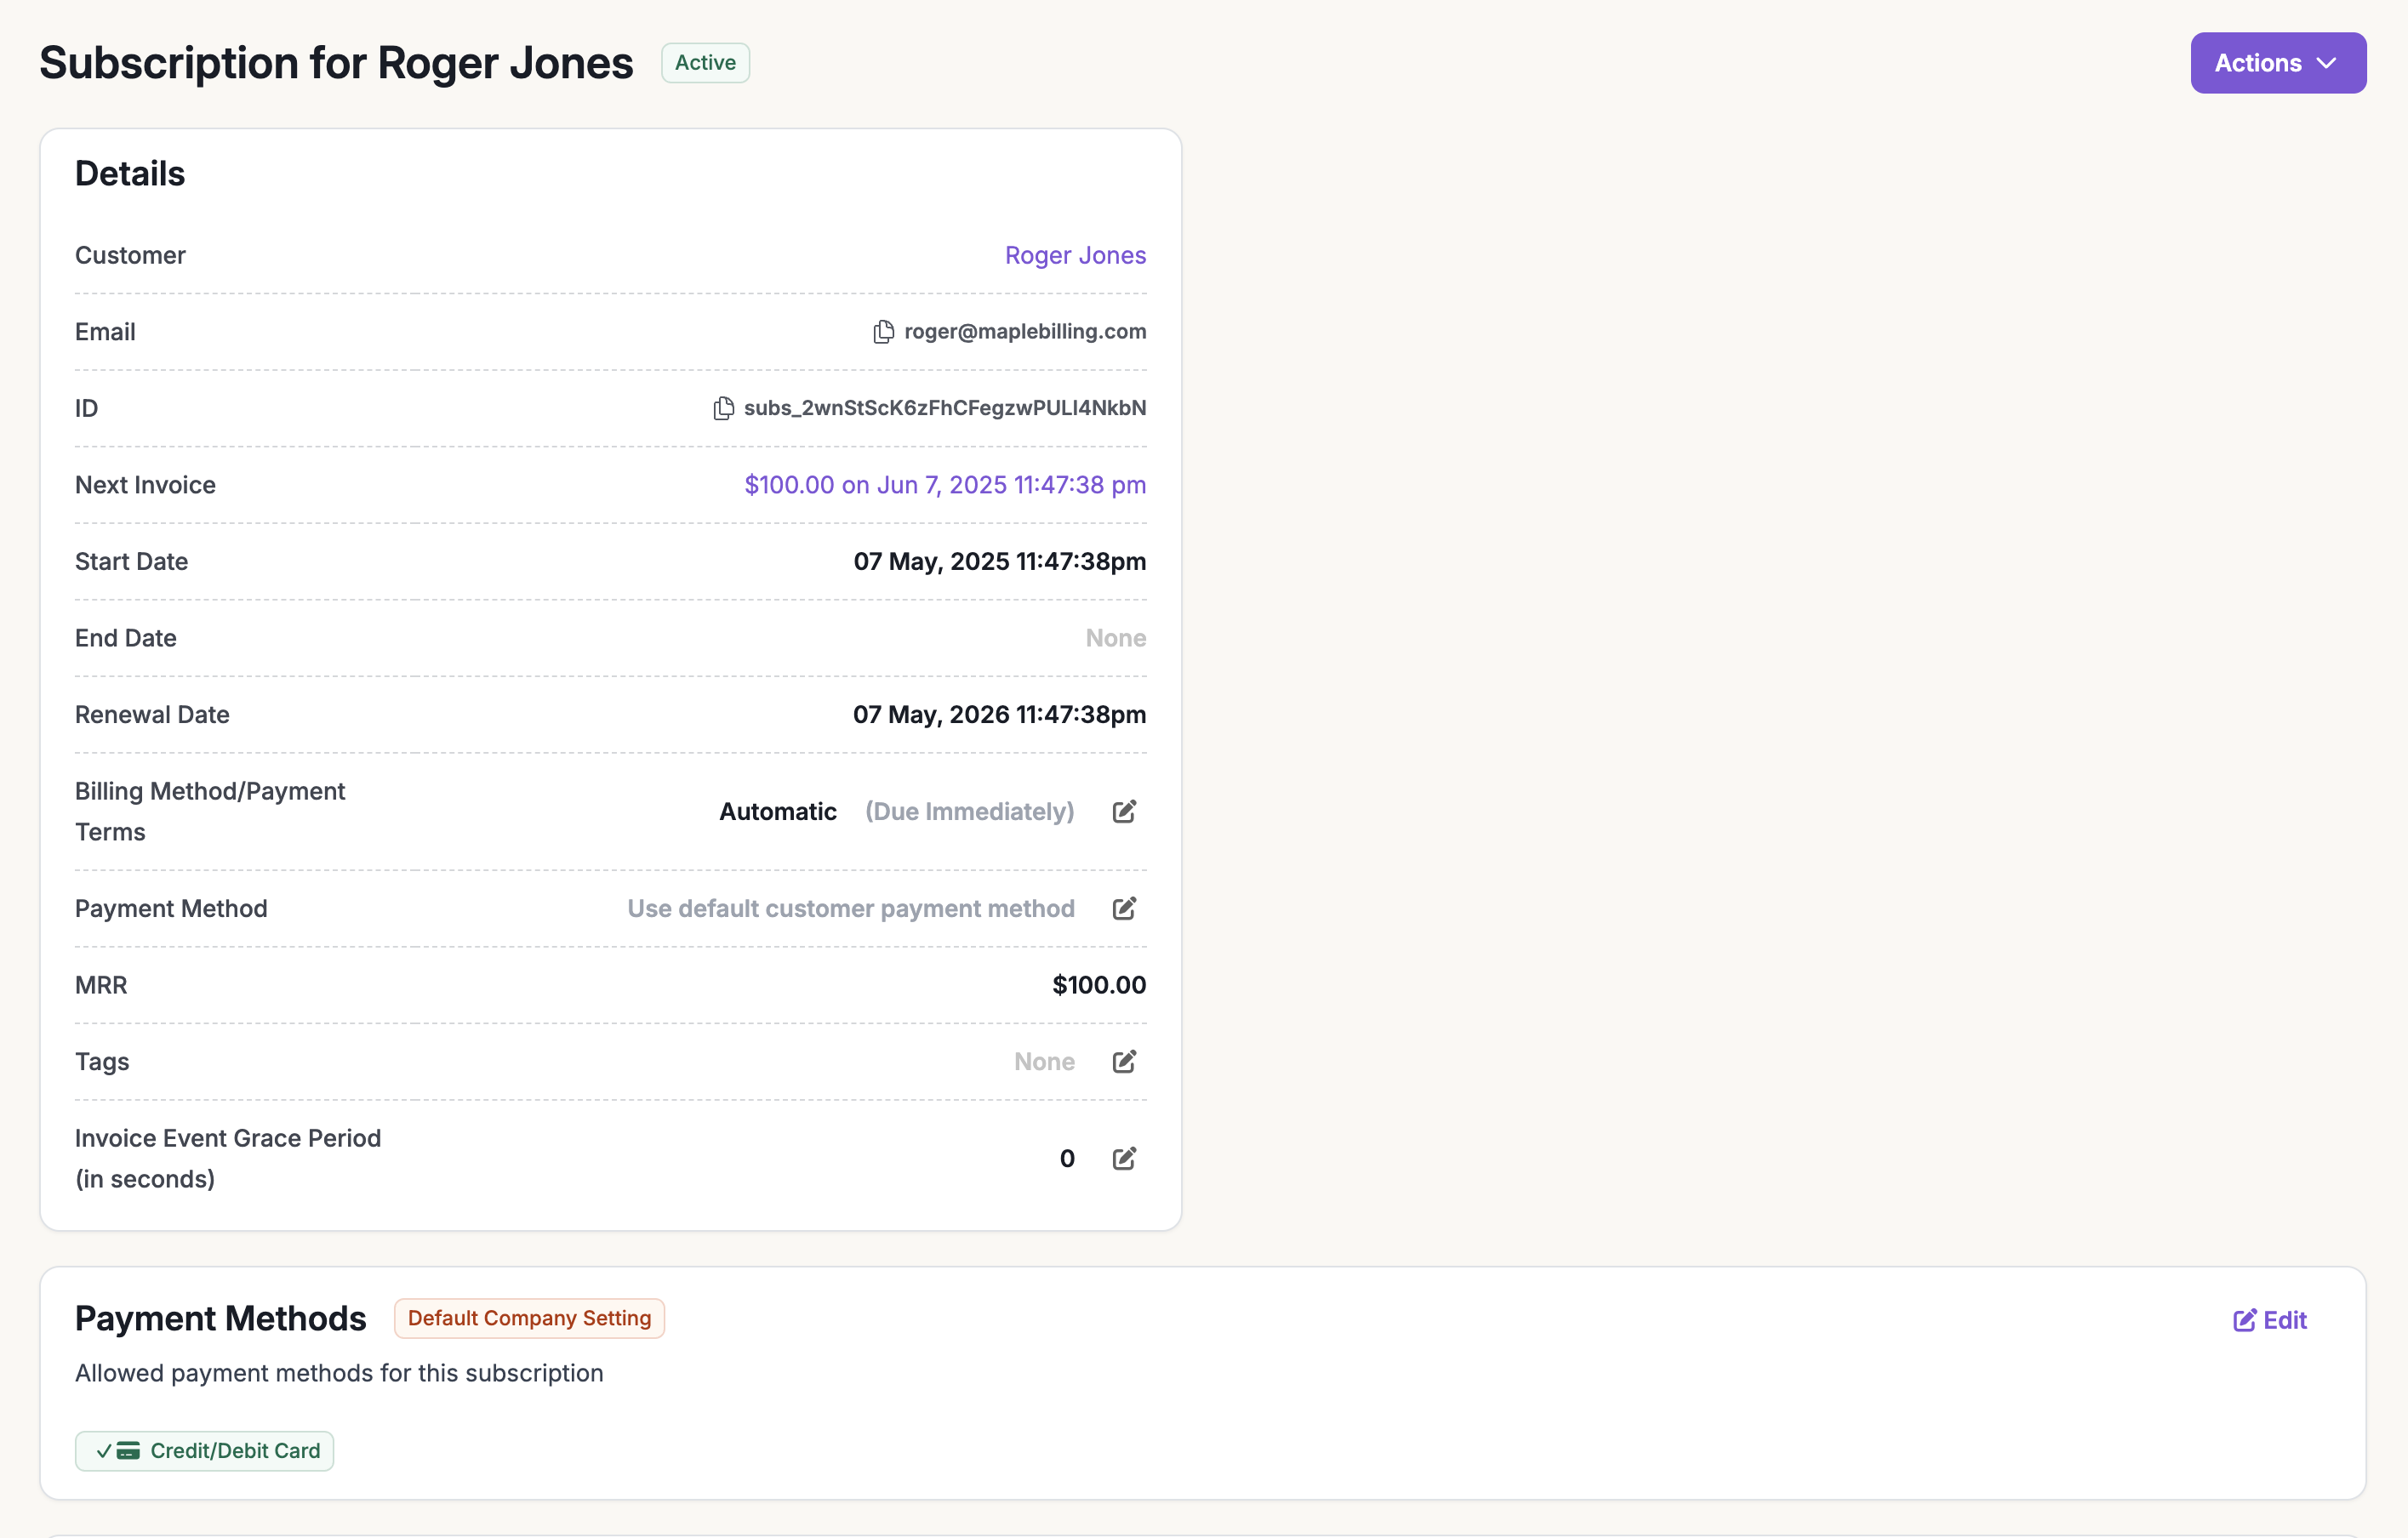
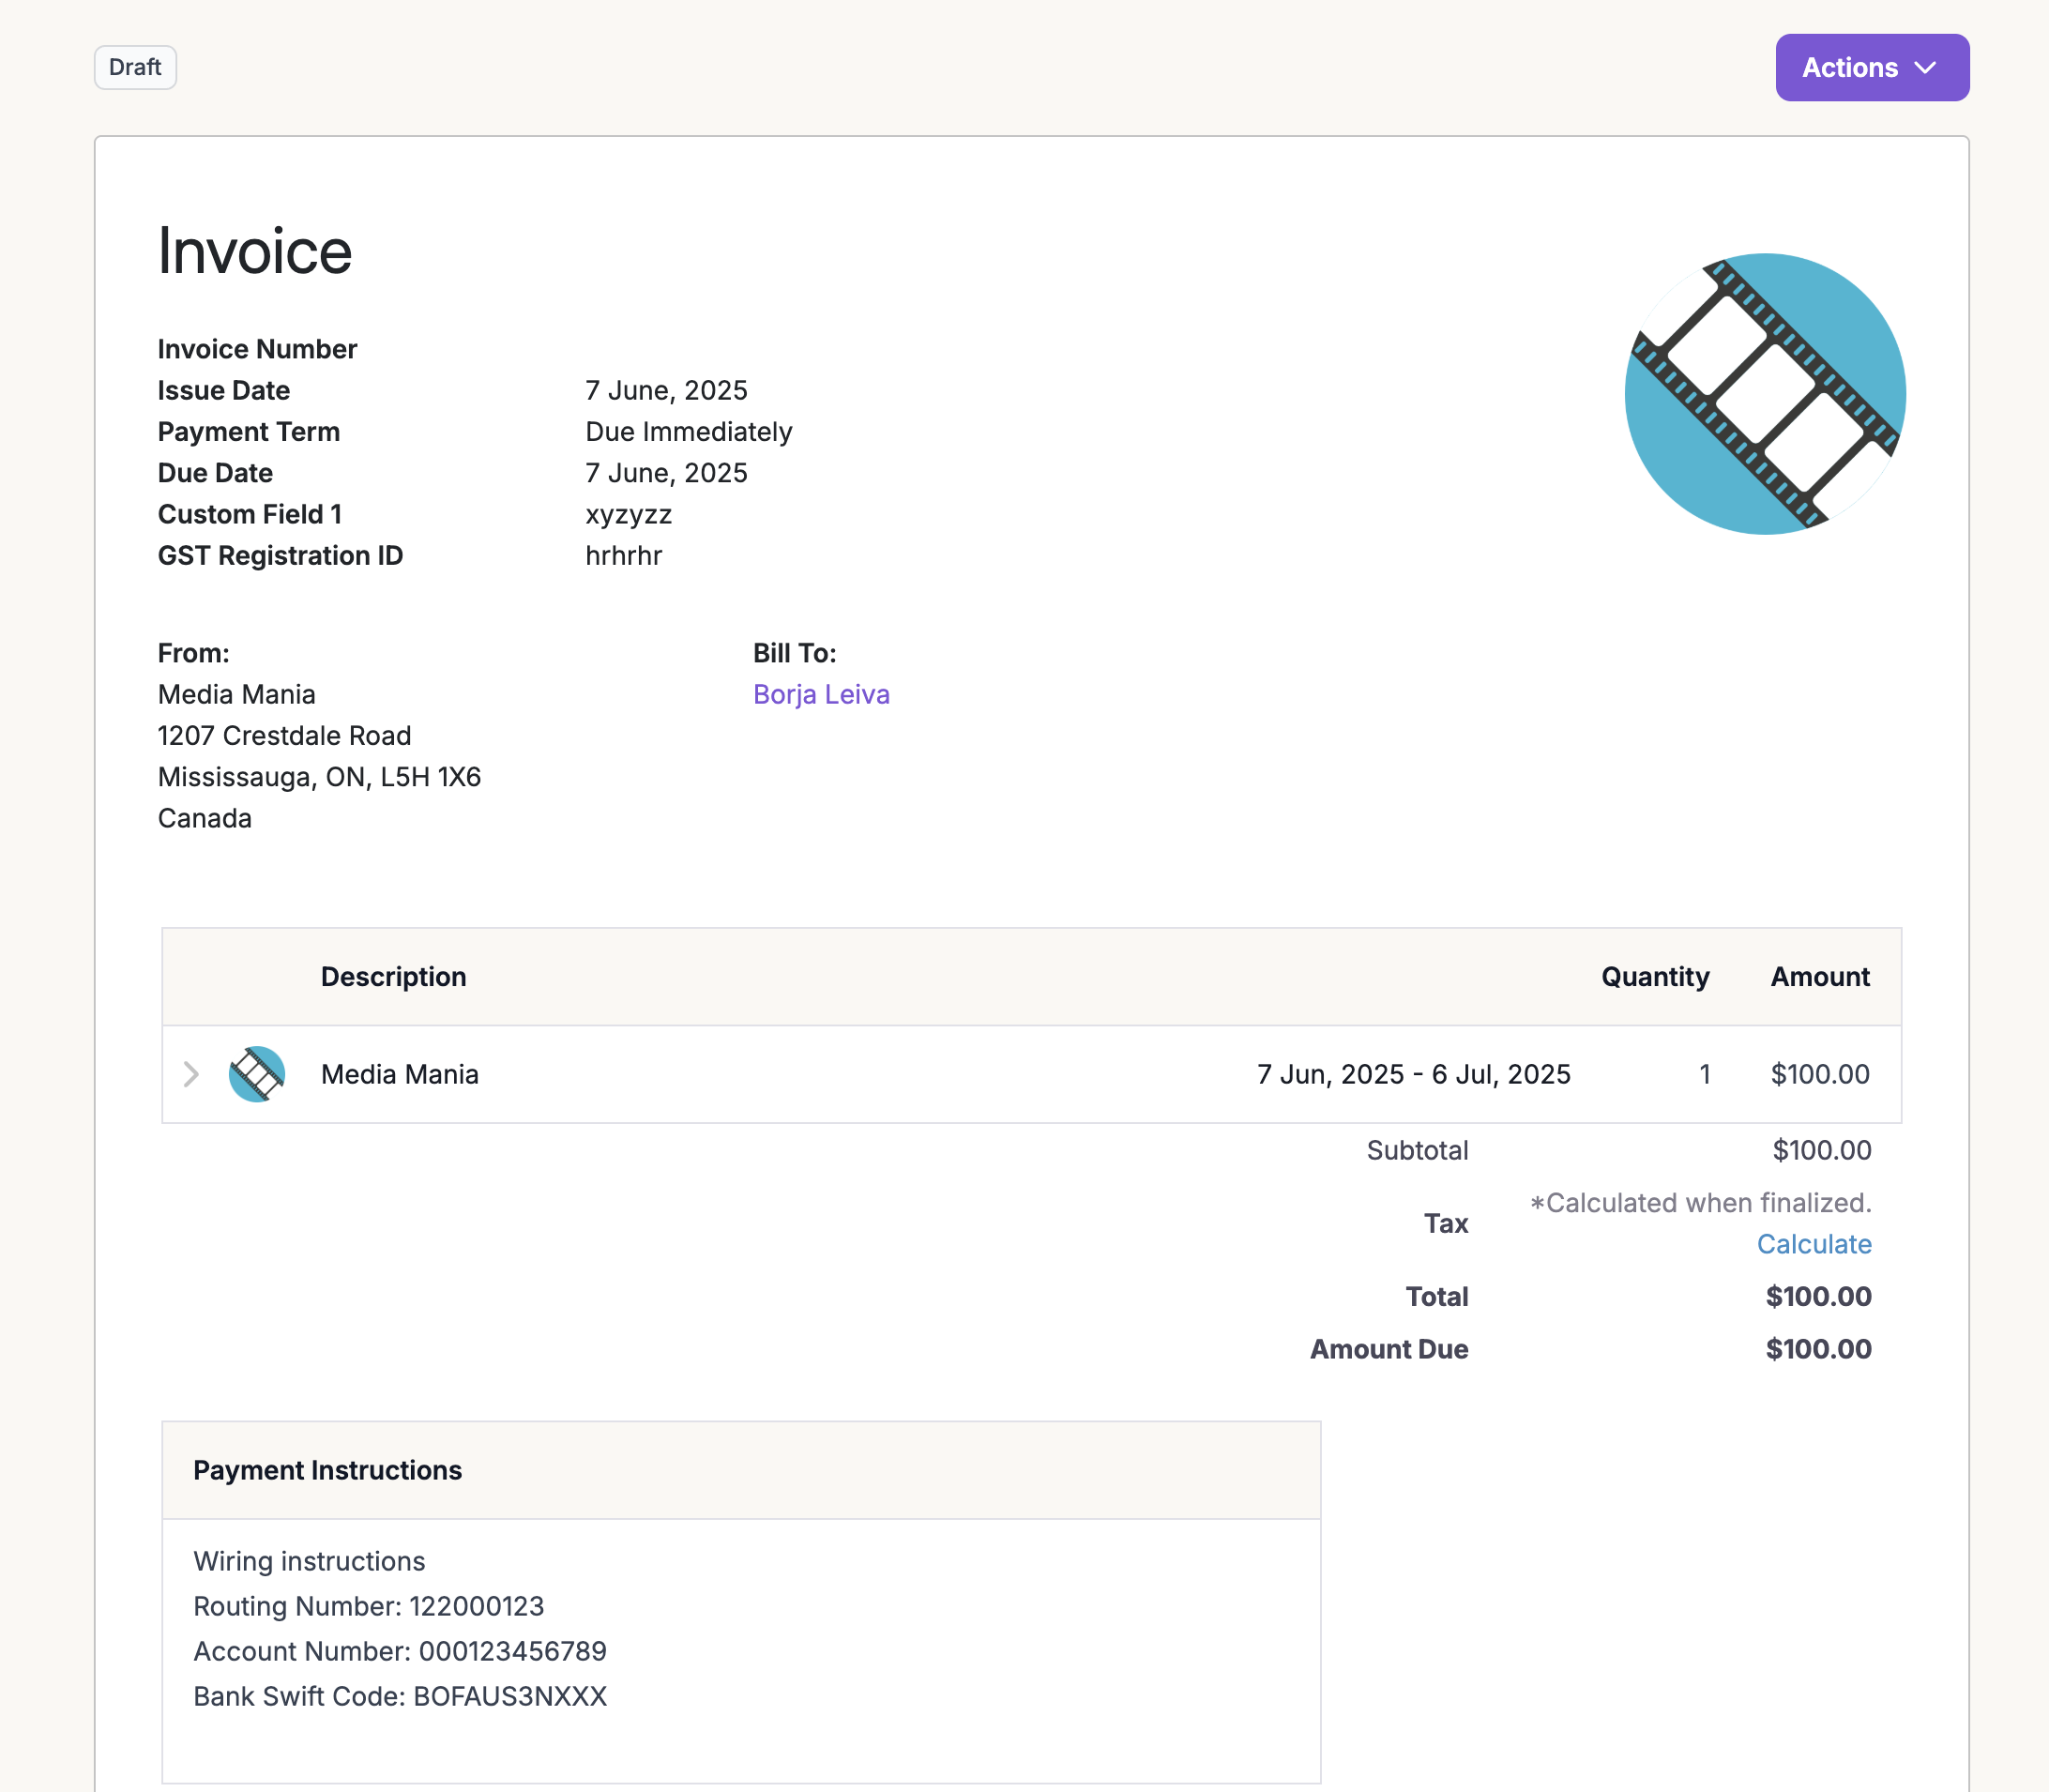
You now have a live subscription, an issued invoice, and (with auto-charge) a completed payment. For more, see Invoicing.